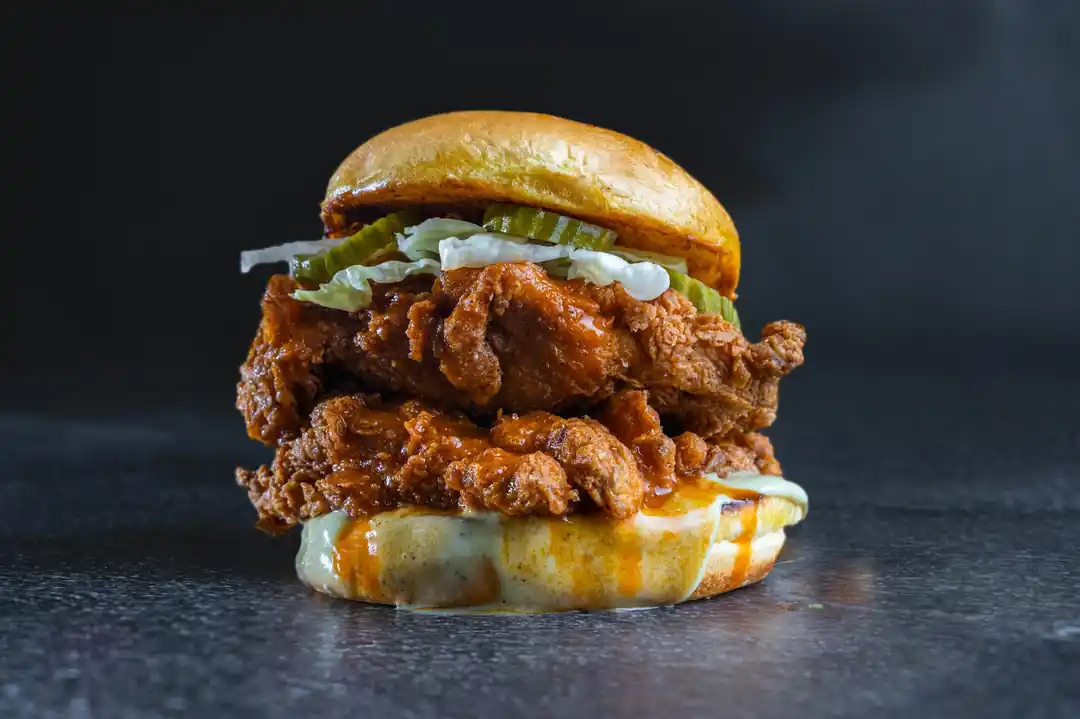
The Homemade Spicy Chicken Sandwich That Will Ruin All Others For You
Forget the drive-thru. I'm talking about a truly epic, crispy, juicy, and fiery spicy chicken sandwich you can make in your own kitchen. It's a game-changer.
There’s a certain kind of magic in a truly great spicy chicken sandwich. It’s a multisensory experience: the audible crunch of the coating, the tender, juicy chicken inside, the slow-building heat that makes your lips tingle, and the cool, crisp contrast of a pickle. For years, I was on a quest, a loyal patron of every fast-food joint and gastropub that claimed to have the "best" one. And while I had some good sandwiches, none of them were quite it. They were either not spicy enough, or all heat and no flavor, or the chicken was disappointingly dry.
Honestly, I had resigned myself to a life of pretty-good-but-not-perfect chicken sandwiches. It felt like one of those things that restaurants just did better, a secret formula I couldn't crack at home. My own attempts were often messy, ending with either soggy breading or chicken that was cooked on the outside but questionable on the inside. It was frustrating. I was convinced there was a trick, a special piece of equipment, or some mystical ingredient I was missing.
But then, I started treating it like a science project. I read about the chemistry of brines, the physics of frying, and the art of flavor layering. And slowly, piece by piece, I assembled a method that didn't just work—it blew every store-bought sandwich I’d ever had out of the water. This isn't just a recipe; it's the result of that obsession. It’s a weekend project that will make your kitchen smell incredible and reward you with a sandwich so good, you’ll feel a little bit sorry for your past self.
The Three Pillars of Perfection
A legendary chicken sandwich doesn't come from a single secret; it's built on a foundation of three key techniques: the brine, the dredge, and the sauce. Get these right, and you're not just cooking, you're conducting a symphony.
Pillar 1: The Buttermilk Brine (The Secret to Juicy Chicken)
This is the absolute non-negotiable first step. I used to think brining was an optional, fussy step, but for fried chicken, it is everything. The magic is in the buttermilk. Its gentle acidity, primarily from lactic acid, works to tenderize the chicken in a way that harsher acids (like lemon juice or vinegar) can't. It breaks down the tough muscle fibers without turning the meat into a mushy mess. I learned from some food science deep-dives that this process not only makes the chicken incredibly tender but also helps it retain moisture during the shock of frying. A 12-to-24-hour soak is the sweet spot. Any less, and you won't get the full effect; any more, and the texture can start to degrade.
To make the brine, you're not just using plain buttermilk. This is your first opportunity to build flavor from the inside out. You'll want to dissolve a good amount of salt in there, which helps the chicken absorb all that buttermilk goodness. I also add a few tablespoons of my favorite hot sauce right into the brine. It doesn't make the chicken overwhelmingly spicy, but it layers in a subtle, foundational heat that permeates the meat itself. It’s a base note that you'll feel more than taste, and it makes all the difference.
Pillar 2: The Double Dredge (The Key to a Craggy, Crispy Crust)
The perfect crust should be craggy, thick, and shatteringly crisp. The secret to achieving this isn't in the ingredients of the flour mixture as much as it is in the technique. You need a double dredge. After you take the chicken out of the buttermilk brine, you'll first coat it in a seasoned flour mixture. This is where you load up on flavor: paprika, garlic powder, onion powder, black pepper, and a healthy dose of cayenne for that first layer of spice.
After the first dry coating, you'll dip it back into a wet mixture. I use a combination of the leftover buttermilk brine and a beaten egg. This wet layer acts as the glue for the second, final coating of the seasoned flour. This double application is what creates those incredible, crunchy, craggy bits that catch the sauce and provide that signature texture. Don't be shy when you're pressing the flour into the chicken on that final coat; you want to create as many nooks and crannies as possible. Let the coated chicken rest on a wire rack for about 15-20 minutes before frying. This helps the coating adhere and dry out a bit, which is crucial for getting an extra-crispy result.
Pillar 3: The Nashville-Style Hot Oil Sauce (The Fiery Finish)
This is where you bring the heat. A true spicy chicken sandwich needs a sauce that's more than just hot; it needs to be complex. My favorite style is inspired by Nashville hot chicken. It’s not a creamy sauce, but rather a spiced oil that you brush over the chicken right after it comes out of the fryer. The base is the hot frying oil itself, which is already infused with chicken flavor. You ladle that hot oil over a bowl of spices, "blooming" them and unlocking their full aromatic potential.
The spice blend is critical. It starts with a serious amount of cayenne pepper—this is where most of the heat comes from. But to balance it, you need brown sugar for a touch of molasses-like sweetness, smoked paprika for smokiness and color, garlic powder for a savory backbone, and a pinch of salt. Whisking the hot oil into these spices creates a fiery, glossy, crimson-red sauce. You brush this onto the hot, crispy chicken, and you can literally hear it sizzle as the crust soaks up all that spicy, flavorful oil. It’s the final, dramatic step that takes this sandwich into the stratosphere.
The Ultimate Spicy Fried Chicken Sandwich Recipe
Ready to change your life? Or at least your lunch? Here’s the full breakdown.
Yields: 4 sandwiches Prep time: 30 minutes, plus 12-24 hours for brining Cook time: 20-25 minutes
Ingredients:
For the Buttermilk Brine:
- 2 large boneless, skinless chicken breasts (about 1.5 lbs total), sliced in half horizontally to create 4 cutlets
- 2 cups buttermilk
- ¼ cup kosher salt
- 2 tbsp hot sauce (like Frank's RedHot or your favorite)
For the Dredge:
- 2 cups all-purpose flour
- ½ cup cornstarch (for extra crispiness)
- 3 tbsp cayenne pepper
- 2 tbsp smoked paprika
- 2 tbsp garlic powder
- 1 tbsp onion powder
- 1 tbsp black pepper
- 2 tsp salt
- 1 large egg
For the Nashville Hot Sauce:
- ½ cup of the hot frying oil
- 4-6 tbsp cayenne pepper (adjust to your desired spice level)
- 2 tbsp dark brown sugar
- 1 tsp smoked paprika
- 1 tsp garlic powder
- ½ tsp salt
For Frying & Assembly:
- 4-6 cups neutral oil (like canola, peanut, or vegetable)
- 4 brioche buns, toasted
- Dill pickle slices
- Mayonnaise or your favorite creamy sauce
Instructions:
-
Brine the Chicken: In a large bowl, whisk together the buttermilk, kosher salt, and hot sauce until the salt is dissolved. Add the chicken cutlets, ensuring they are fully submerged. Cover and refrigerate for at least 12 hours, and up to 24 hours.
-
Prepare the Dredge: In a wide, shallow dish, whisk together the flour, cornstarch, and all the spices for the dredge (cayenne, paprika, garlic powder, onion powder, pepper, and salt). In a separate shallow dish, whisk the egg with ¼ cup of the buttermilk brine from the chicken marinade.
-
Dredge the Chicken: Set up a dredging station. Take one piece of chicken from the brine, letting excess drip off. Coat it thoroughly in the dry flour mixture, shaking off the excess. Dip it into the wet egg/buttermilk mixture, and then place it back into the dry flour for a final, heavy coat. Press the flour firmly onto the chicken to create a thick, shaggy crust. Place the coated chicken on a wire rack and repeat with the remaining pieces. Let them rest for 15-20 minutes.
-
Heat the Oil: While the chicken rests, pour the frying oil into a large, heavy-bottomed pot or Dutch oven to a depth of about 2 inches. Heat over medium-high heat until it reaches 350°F (175°C).
-
Fry the Chicken: Carefully place two pieces of chicken into the hot oil. Don't overcrowd the pot. Fry for 4-6 minutes per side, until deep golden brown, crispy, and the internal temperature reaches 165°F (74°C). Remove the chicken to a clean wire rack to drain. Repeat with the remaining chicken.
-
Make the Hot Sauce: While the last batch of chicken is frying, prepare the hot sauce. In a heatproof bowl, whisk together the cayenne, brown sugar, paprika, garlic powder, and salt. Once the chicken is done frying, carefully ladle ½ cup of the hot frying oil directly into the spice mixture, whisking continuously until a glossy sauce forms.
-
Sauce and Assemble: Brush the hot oil sauce generously over all sides of the freshly fried chicken cutlets. To assemble, spread mayonnaise on the toasted brioche buns, add a piece of sauced-up chicken, top with plenty of dill pickle slices, and place the top bun on.
Your New Reality
The first bite is a moment of revelation. The crunch is loud. The chicken is impossibly juicy. The heat from the sauce is immediate but balanced by the sweetness of the brown sugar and the creamy mayo. The tang of the pickle cuts through the richness perfectly. It’s a sandwich that demands your full attention.
Making this isn't just about following steps; it's about embracing a process. It’s the satisfaction of taking simple ingredients and, through time and technique, transforming them into something truly extraordinary. It’s a weekend project, a labor of love, but the payoff is a meal that will ruin you for all other spicy chicken sandwiches. And honestly, you'll be glad it did.
You might also like

Beyond the Hype: Real Marketing Strategies for Crypto's New Era
Marketing in the crypto space has grown up. Let's explore the strategies that build trust and create lasting value in 2024.
Your Plate, Your Shield: The Best Foods for a Virus-Proof Immune System
Feeling like you need an extra layer of defense against seasonal bugs? Let's explore the delicious, powerful foods that can help fortify your immune system from the inside out.

Switzerland's Wild Heart: A Nature Lover's Guide to the Alps
It’s time to trade cityscapes for stunning peaks. If your soul craves crisp mountain air and landscapes that look like they’ve been painted, you’ve come to the right place.

Finding Your Perfect Fit: How to Choose the Best CRM for Your Small Business
Drowning in spreadsheets? It might be time for a CRM. Let's walk through how to pick the right customer relationship management software without the headache.

Your Guide to a DIY Home Energy Audit: Stop Leaks and Start Saving
That creeping feeling when the utility bill arrives? It's time to fight back. Learn how to conduct a simple home energy audit to find hidden energy vampires and start saving money.