Mastering the Mosh Pit: Your Guide to Epic Concert Photography Settings
Ever wonder how photographers capture those electrifying live music moments? It's all about taming your camera when the lights are low and the energy is high.
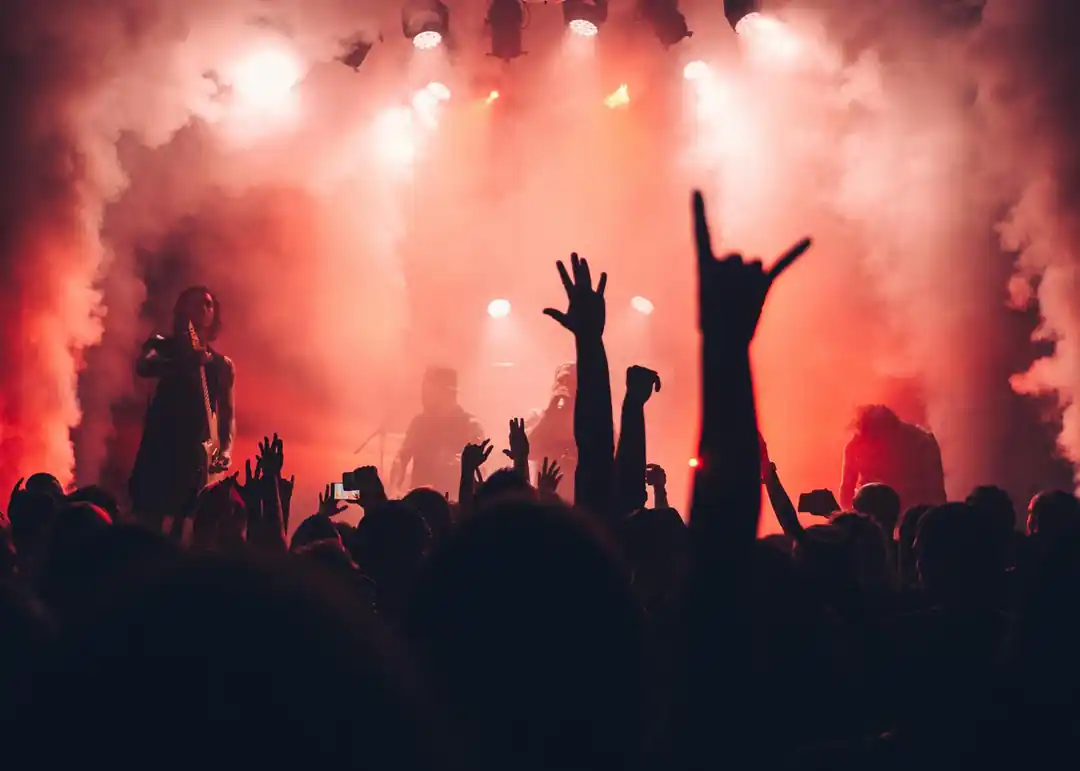
There’s something truly magical about live music, isn't there? That collective energy, the pulsating rhythm, the sheer raw emotion pouring from the stage. As a photographer, trying to bottle that lightning is both an exhilarating challenge and, let's be honest, sometimes a frustrating one. I mean, you're battling unpredictable lighting, fast-moving subjects, and often, a sea of enthusiastic (and sometimes oblivious) fans. But with the right camera settings and a little bit of know-how, you can absolutely capture those epic moments that truly tell the story of a night.
I remember my first few attempts at concert photography, armed with a decent camera but absolutely no clue about how to tame the beast that is low-light, high-contrast stage lighting. My photos were a blurry, noisy mess, and I felt like I was missing the entire point. It took a lot of trial and error, and a fair bit of research, to finally understand that concert photography isn't just about pointing and shooting; it's about anticipating, adapting, and making your camera work with the chaos, not against it. So, if you've ever dreamt of freezing that perfect guitar solo or capturing the singer's passionate gaze, let's dive into the settings that will get you there.
Taming the Exposure Triangle: ISO, Aperture, and Shutter Speed
Concert photography is essentially a masterclass in balancing the exposure triangle in the most challenging conditions. You're constantly fighting for light, trying to freeze motion, and aiming for a clear, impactful image. It's a delicate dance, but once you understand the core principles, it becomes second nature. The goal is always to let in enough light without introducing too much blur or overwhelming noise.
First up, Aperture. This is your best friend in a dark venue. You want to open it up as wide as your lens allows, meaning you'll be looking for the lowest f-number possible – think f/1.2, f/1.4, f/1.8, or f/2.8. A wide aperture not only sucks in maximum light, which is crucial when the stage is dimly lit, but it also creates that beautiful, creamy background blur (bokeh) that really makes your subject pop. It helps isolate the performer from the often-distracting elements of the stage or crowd, drawing the viewer's eye exactly where you want it.
Next, let's talk about ISO. This is where many photographers, especially beginners, get a little nervous. We're often taught to keep ISO as low as possible to avoid noise, but in concert photography, you simply can't afford that luxury. You'll need to embrace higher ISOs, starting around 1600 and often pushing it to 3200, 6400, or even higher depending on your camera and the venue's lighting. Modern cameras are incredibly good at handling high ISOs, and a sharp, slightly grainy image is always preferable to a blurry or underexposed one. Plus, post-processing software can work wonders in reducing noise these days, so don't be afraid to crank it up to get the shot.
Finally, Shutter Speed is your weapon against motion blur. Performers rarely stand still, and you want to capture their energy, not a ghostly streak. Aim for a shutter speed of at least 1/200th of a second, and ideally 1/250th or faster, especially for energetic acts. If the artist is more stationary, or during a slower ballad, you might get away with 1/125th, but that's pushing it and requires a very steady hand. Remember, a fast shutter speed freezes the action, giving you those crisp, dynamic shots that truly capture the moment.
Focusing on the Action and Getting Your Colors Right
Beyond the core exposure settings, there are a few other crucial camera functions that can make or break your concert photos. Getting sharp focus on a moving subject in challenging light is no small feat, and dealing with the kaleidoscope of stage lights can turn skin tones into alien hues if you're not careful.
For Focusing, ditch the single-shot autofocus mode. You need something that can keep up with the performers. Continuous Autofocus (often called AI-Servo on Canon or AF-C on Nikon/Sony) is your go-to. This mode continuously tracks your subject as they move, helping you maintain focus even when they're dancing across the stage. Pair this with a single focus point rather than a wide area or automatic selection. This gives you precise control, ensuring your camera focuses on the performer's face or instrument, not the mic stand or the background. It's a game-changer for nailing sharp shots in chaotic environments.
White Balance is another tricky one. Stage lighting is notoriously inconsistent, shifting from warm oranges to cool blues, vibrant reds, and electric greens in a matter of seconds. While some pros advocate for setting a custom Kelvin temperature, many recommend sticking with Auto White Balance (AWB). The reasoning is simple: the lights change too fast for you to manually adjust. The real secret here, though, is to shoot in RAW. RAW files capture far more data, giving you immense flexibility to correct white balance and color casts in post-processing without sacrificing image quality. This means you can worry less about perfect colors in-camera and more about nailing the exposure and focus.
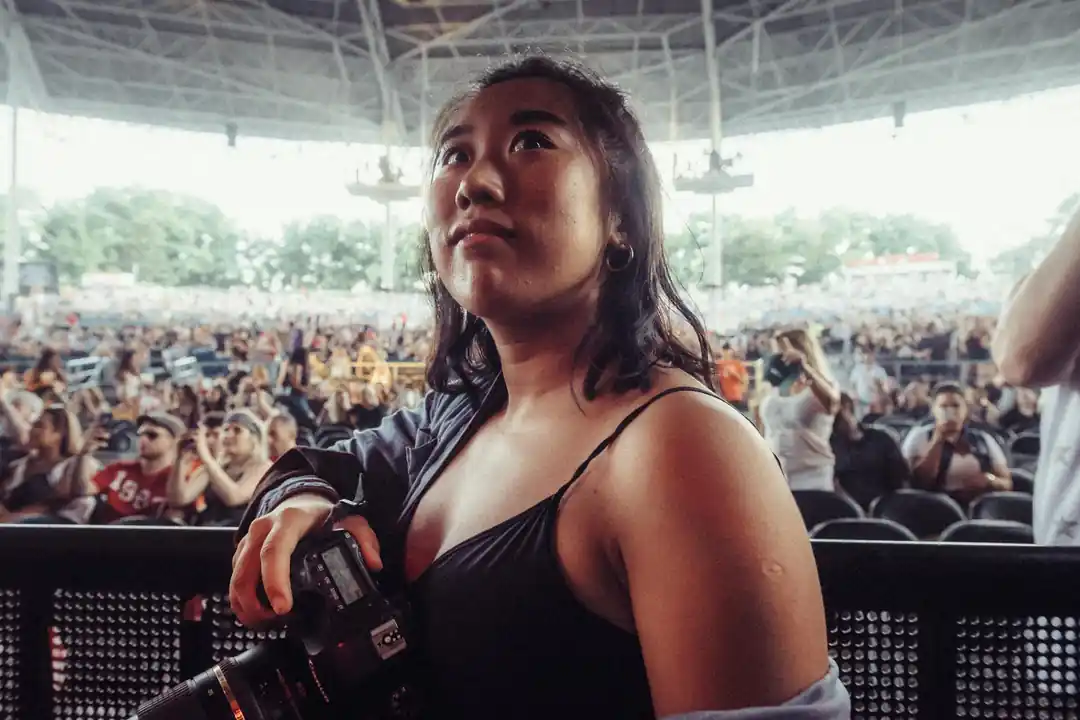
Beyond the Settings: Gear, Mindset, and Workflow
While camera settings are fundamental, they're just one piece of the puzzle. To truly excel in concert photography, you need to consider your gear, your approach, and what you do after the show. It's a holistic process that combines technical skill with artistic vision.
Investing in fast lenses is perhaps the most impactful gear decision you can make. Lenses with wide maximum apertures (like f/1.8 or f/2.8) are designed to perform exceptionally well in low light, allowing you to keep your ISO lower and your shutter speed faster. A "nifty fifty" (50mm f/1.8) is an affordable prime lens that's a favorite among concert photographers for its light-gathering capabilities and sharp results. If your budget allows, a 24-70mm f/2.8 and a 70-200mm f/2.8 zoom lens are workhorses that offer versatility without compromising on aperture.
Your shooting mode choice also matters. While Aperture Priority (Av or A) can be a good starting point, most experienced concert photographers swear by Manual mode. This gives you complete control over all three elements of the exposure triangle, which is essential for adapting to the wildly fluctuating light levels on stage. It takes practice, but the consistency and control it offers are invaluable. And whatever you do, avoid using flash. It's almost universally frowned upon by venues and artists, can be distracting, and often produces harsh, unflattering light that kills the mood.
Finally, remember that the work doesn't end when the last note fades. Post-processing is an absolutely critical part of concert photography. Even with perfect in-camera settings, the dynamic and often colorful stage lighting can lead to images that need finessing. Software like Adobe Lightroom or Photoshop allows you to fine-tune exposure, adjust white balance, reduce noise, and enhance colors, transforming a good shot into a truly great one. It's where you bring your vision to life and ensure the final image reflects the energy and emotion you experienced.
Concert photography is a journey, not a destination. It's about learning to anticipate the moments, understanding the interplay of light and motion, and constantly refining your technique. Don't be discouraged by initial challenges; every blurry shot is a lesson learned. Keep practicing, keep experimenting, and most importantly, keep enjoying the music. The more you immerse yourself, the more those electrifying moments will reveal themselves through your lens.
You might also like

Finding Your Footing: The Safest (and Most Stunning) Neighborhoods in Mexico City
Worried about where to stay in Mexico City? Let's push past the headlines and talk about the beautiful, vibrant, and safe neighborhoods that make CDMX an unforgettable travel destination.

How to Meal Prep on a Budget: Your Guide to Eating Well for a Week
Tired of expensive takeout and last-minute dinner stress? Discover how to master the art of meal prepping for a week on a budget. It's easier than you think and will change your relationship with food and your finances.
Beyond the Slopes: The Ultimate US Winter Getaways for Non-Skiers
Dreaming of a winter escape but not a fan of skiing? Discover the coziest towns, sunniest retreats, and most magical experiences the US has to offer.

The Ultimate Guide to Driving in Norway as a Tourist
Dreaming of a Norwegian road trip? Here’s everything you need to know about driving in Norway with a US license, from critical road rules to navigating those scenic fjord routes.

Gold's Secret Language: How Economic Tea Leaves Move Its Price
Ever watch the price of gold and wonder what makes it tick? It's not random. We're diving into the key economic signals that tell us where the precious metal might be heading next.