The Ultimate Guide to Smoking Texas-Style BBQ Brisket
Ready to tackle the king of Texas BBQ? This step-by-step guide breaks down everything you need to know to smoke a brisket that's tender, juicy, and packed with flavor.
There’s something almost primal and deeply satisfying about smoking a Texas-style brisket. It’s a culinary rite of passage, a long and patient journey that transforms a tough cut of beef into something truly magical. I remember my first attempt vividly—the nervous energy, the constant temperature checks, the feeling of accomplishment when I finally pulled that dark, jiggly piece of meat off the smoker. It wasn't perfect, but it was a start, and it hooked me for life.
The process is a testament to the "low and slow" philosophy that defines American barbecue. It’s not about rushing; it’s about carefully managing fire, smoke, and time to break down connective tissue and render fat, resulting in that signature melt-in-your-mouth texture. This isn't just cooking; it's a project. It's a weekend-consuming, deeply rewarding endeavor that, when done right, brings friends and family together in a way few other meals can.
So, if you're ready to embark on this delicious journey, I'm here to walk you through it. We'll cover everything from selecting the right cut to the all-important final slice. Forget the complicated recipes and intimidating jargon. At its heart, smoking a brisket is about simple, quality ingredients and a respect for the process. Let's get started.
Step 1: Choosing and Trimming Your Brisket
The foundation of any great brisket is, unsurprisingly, the brisket itself. You'll want to look for a "full packer" brisket, which includes both the leaner "flat" and the fattier "point" connected by a thick vein of fat. When you're at the butcher, ask for a USDA Prime grade if you can find and afford it. The superior marbling in a Prime brisket provides a significant advantage, offering more insurance against drying out during the long cook. If not, a good quality Choice grade will also yield fantastic results.
Trimming is where the real work begins, and it's a step you absolutely cannot skip. The goal is to create an aerodynamic shape for even cooking and to remove the hard, non-rendering fat while leaving a consistent quarter-inch layer of the softer fat cap. This fat cap will slowly melt and baste the meat throughout the cook, keeping it moist and flavorful. Use a sharp boning knife and take your time. Trim off any discolored edges and the thick, hard deckle fat between the point and the flat as much as you can without fully separating them. It feels daunting at first, but a well-trimmed brisket is the first sign of a pitmaster who knows their stuff.
Think of it as sculpting. You're removing the unnecessary parts to reveal the masterpiece within. A smooth, uniform surface allows the smoke and heat to flow evenly around the meat, preventing any parts from cooking too quickly or getting acrid. Don't discard all the trimmed fat! You can render it down into beef tallow, a liquid gold that you can use to baste the brisket later in the cooking process.
Step 2: The Rub – Keep It Simple
In the world of Texas barbecue, less is more. While other regions might favor complex, multi-ingredient rubs, the classic Texas approach is beautifully minimalistic. The most traditional and widely respected rub consists of just two ingredients: coarse kosher salt and coarse black pepper. This is often called a "Dalmatian rub," and for good reason—it lets the flavor of the beef and the smoke be the stars of the show.
A common starting ratio is 50/50 by volume, but many pitmasters adjust this to their personal preference. I personally lean towards a slightly heavier pepper ratio, maybe 60/40, using a 16-mesh "café grind" black pepper for a robust, crusty bark. The key is to use coarse grinds for both. Fine table salt will dissolve too quickly and can over-season the meat, while fine pepper can become pasty. The larger granules of kosher salt and coarse pepper adhere to the surface and help form that iconic, crunchy bark we're all chasing.
To apply the rub, some people use a binder like yellow mustard or a thin layer of hot sauce, but it's not strictly necessary. The moisture on the surface of the meat is often enough. Sprinkle the rub evenly from about a foot above the brisket to get a nice, even coating on all sides. Be generous—it’s a thick cut of meat and it can handle it. Once seasoned, you can let it sit for at least an hour at room temperature or, for even better results, wrap it and let it rest in the refrigerator overnight. This acts as a dry brine, allowing the salt to penetrate deep into the meat.
Step 3: The Smoke – Low and Slow
This is where the patience really kicks in. You'll want to get your smoker preheated and stabilized at a consistent temperature, typically between 225°F and 275°F. For beginners, I recommend sticking closer to 250°F. Consistency is far more important than the specific number, so use a reliable digital thermometer at the grate level to monitor your smoker's temperature, not just the one on the lid.
The choice of wood is also critical for authentic Texas flavor. Post oak is the traditional wood of choice, providing a mild, clean smoke that complements beef perfectly. If you can't find post oak, hickory and pecan are excellent alternatives. Mesquite can also be used, but it has a much stronger flavor, so it's best used in moderation or mixed with a milder wood. You're looking for a thin, almost invisible "blue smoke," which indicates a clean-burning fire. Thick, white, billowing smoke is a sign of incomplete combustion and will make your brisket taste bitter and acrid.
Place the brisket on the smoker with the fat side up. This allows the rendering fat to cascade down and baste the meat. Insert a leave-in probe thermometer into the thickest part of the flat to monitor the internal temperature. Now, close the lid and walk away. For the first few hours, you want to avoid opening the smoker as much as possible to allow a good bark to form.
Step 4: The Wrap (The Texas Crutch)
After several hours in the smoke, you'll notice the internal temperature of the brisket starts to climb steadily, but then it will suddenly hit a wall, usually somewhere between 150°F and 165°F. This is "the stall," a dreaded but completely normal phase where the meat is essentially sweating, and the evaporative cooling effect prevents the temperature from rising. To push through the stall and retain moisture, we use a technique known as the "Texas Crutch"—wrapping the brisket.
You have two main options for wrapping: aluminum foil or pink butcher paper. Foil is an excellent insulator and will power you through the stall the fastest, but it steams the meat and can soften the bark you've worked so hard to create. Butcher paper is the preferred choice for most modern pitmasters. It's less insulating than foil, so the cook takes a bit longer, but it allows the brisket to breathe, preserving the bark's texture while still retaining enough moisture to keep the meat juicy.
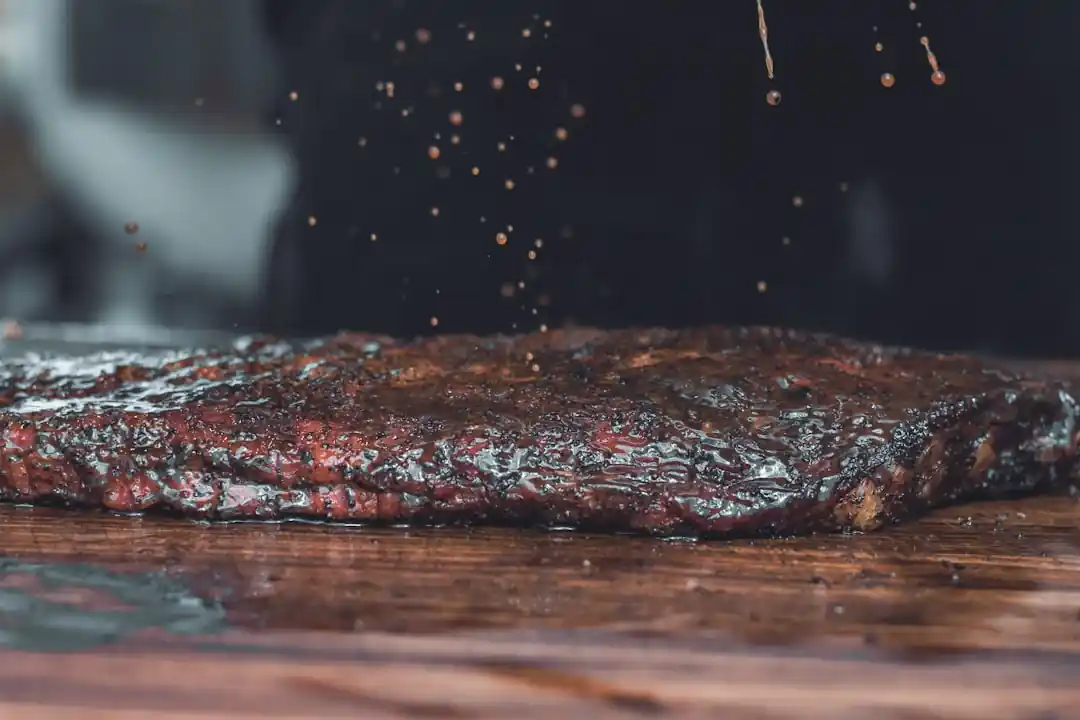
Once the bark is a dark mahogany color and has set nicely, lay out two overlapping sheets of butcher paper. You can drizzle some of that rendered beef tallow onto the paper before placing the brisket on top. Wrap it as tightly as you can, like a present, and place it back on the smoker. Continue cooking until the internal temperature reaches around 203°F. However, the final temperature is just a guideline. The real test is feel. It should be "probe tender," meaning your thermometer probe slides into the meat with almost no resistance, like going into a jar of peanut butter.
Step 5: The Rest – The Final Test of Patience
This is the most overlooked but arguably one of the most important steps in the entire process. You cannot, I repeat, cannot slice into your brisket right off the smoker. The muscle fibers are tense, and the juices are all concentrated in the center. Slicing it now would result in a dry, disappointing brisket as all that precious moisture pours out onto your cutting board.
Once the brisket is probe tender, pull it off the smoker and let it rest. A short rest of about 20-30 minutes on the counter is fine to stop the cooking process. After that, you need a long rest. The best method is to place the wrapped brisket in a dry, empty cooler (a "faux Cambro"). It will stay safely warm for hours. A minimum rest of one hour is required, but two to four hours is even better. This extended rest allows the muscle fibers to relax and, crucially, for the juices to redistribute evenly throughout the meat, ensuring every slice is moist and flavorful.
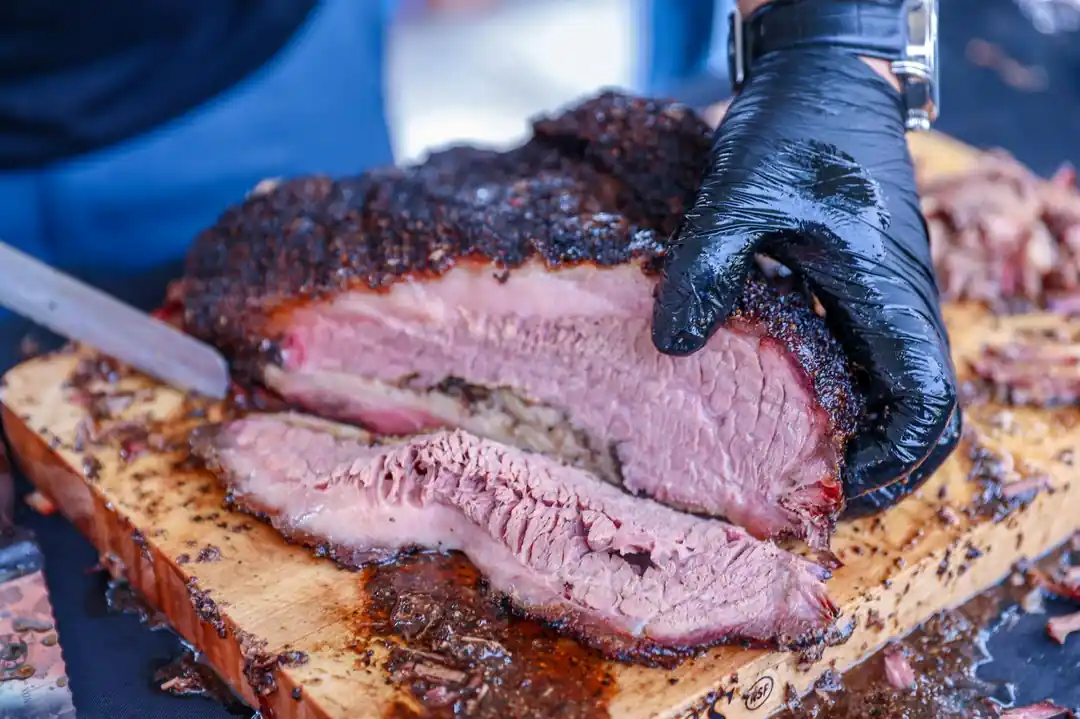
When you're finally ready to serve, unwrap the brisket and prepare for the moment of truth. Separate the point from the flat, as the grain of the meat runs in different directions. Slice the flat against the grain into pencil-thick slices. The point, being fattier, can be sliced thicker or cubed to make delicious burnt ends. Seeing that perfect smoke ring and watching the slices bend over your finger without breaking is the ultimate reward. It’s a long journey, but that first bite makes every single minute worth it. Enjoy the fruits of your labor—you've earned it.
You might also like

The Ultimate Beginner's Guide to Micro-Investing
Ever felt like investing was a club you weren't invited to? Micro-investing is changing that, one penny at a time. Here's how to start building wealth with the spare change in your pocket.
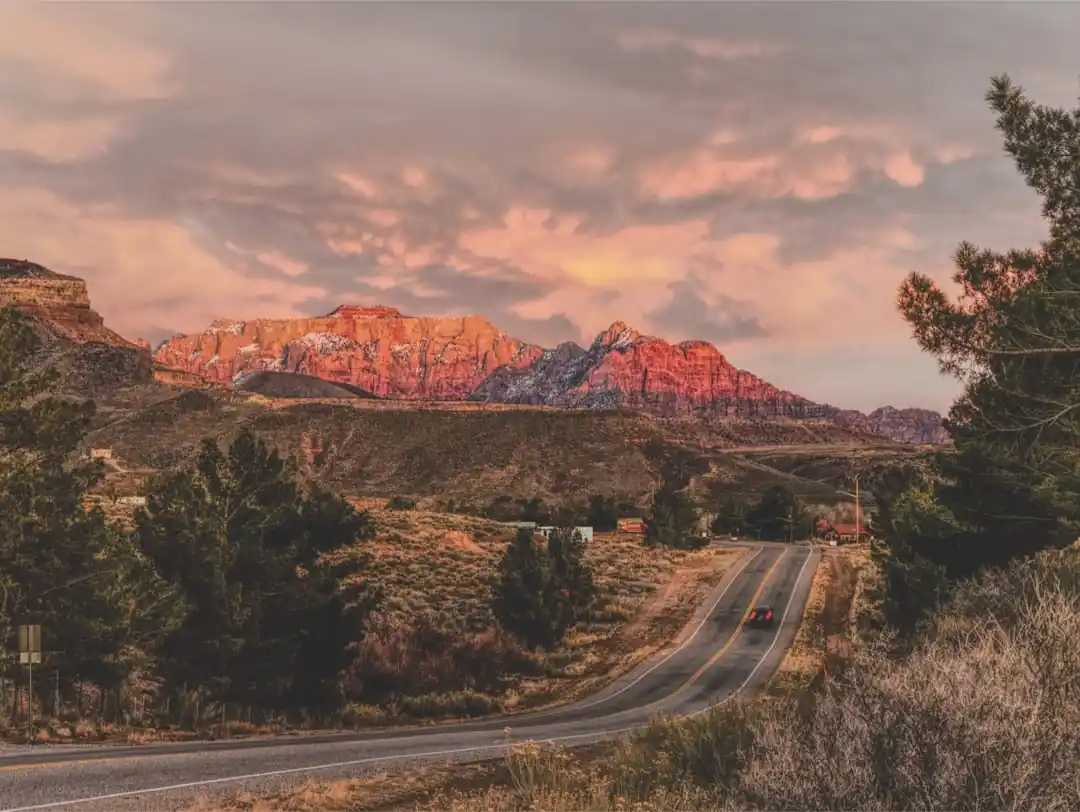
Zion's Gateways: Choosing the Best Airport for Your National Park Adventure
Planning a trip to the majestic Zion National Park? The airport you choose can shape your entire journey. Let's break down the best options to get you to the red rocks.

The American's Guide to Booking a Train Ticket in Bangladesh
Thinking of seeing Bangladesh by rail? It's an incredible experience, but booking a ticket isn't quite like Amtrak. Here's what you need to know.

Your First Aloha: Which Hawaiian Island Should You Visit?
Dreaming of your first trip to the Hawaiian islands but don't know where to start? I'm breaking down the vibes of each major island to help you find your perfect slice of paradise.
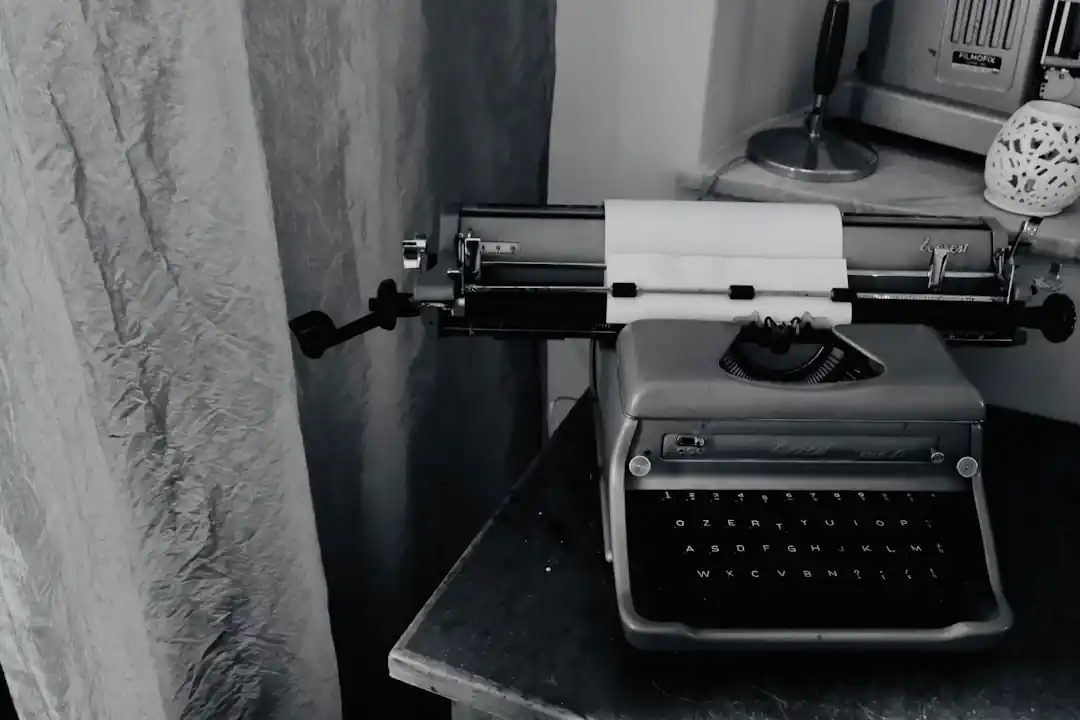
Cracking the Code: How to Build a Film with the Three-Act Structure
Ever wonder what makes your favorite movies just *work*? It’s not magic, but a timeless storytelling blueprint you can learn, too.