The Soul of Naples: A Beginner's Guide to Authentic Neapolitan Pizza Dough
Forget everything you thought you knew about pizza. We're diving deep into the simple, sacred art of making true Neapolitan pizza dough from scratch. It's easier than you think.
There’s a certain romance to Neapolitan pizza. It’s not just food; it’s a story. It’s the blistering char, the impossibly light and airy crust, and that signature puffy edge—the cornicione—that whispers tales of old-world Naples. For the longest time, I believed this kind of perfection was out of reach for a home cook like me. I thought it belonged exclusively to the seasoned pizzaiolos with their scorching wood-fired ovens and generations of inherited knowledge.
Honestly, my first few attempts were… humbling. I ended up with crusts that were either tough as leather or disappointingly flat. But my obsession with that perfect slice kept me going. I started digging into the official guidelines from the Associazione Verace Pizza Napoletana (AVPN), the guardians of this culinary tradition. What I discovered was both a science and an art, a process built on a foundation of profound respect for simplicity.
This journey taught me that the soul of a Neapolitan pizza isn't in a laundry list of fancy toppings. It's in the dough. It’s a living, breathing thing that, when treated right, transforms four basic ingredients into a culinary masterpiece. And the best part? You don't need a fiery brick oven to start creating it at home. You just need a little patience and a willingness to get your hands dirty.
The Sacred Quartet: Why Every Ingredient Matters
You might be surprised to learn that authentic Neapolitan pizza dough contains only four ingredients: flour, water, salt, and yeast. That’s it. There’s no sugar to "feed" the yeast, no olive oil to soften the dough. This minimalism is intentional. It forces you to rely on quality and technique, not shortcuts.
The undisputed star of the show is Italian Type "00" flour. I can't stress this enough: using the right flour is a complete game-changer. This isn't just a fancy name; "00" refers to how finely the flour is milled. It’s like talcum powder, and this fine texture allows the dough to become incredibly soft and pliable. It creates a crust that’s tender and light, with a satisfying chew, rather than the dense, bready texture you get from all-purpose flour. Brands like Caputo are legendary in Naples for a reason, and they are widely available in the US now.
Water is the second key player. The goal is a specific hydration level—typically between 60% and 65% of the flour's weight. This high water content is what creates the steam that puffs up the crust in the oven, giving it that airy, open crumb. A kitchen scale is your best friend here; precision matters. Fine sea salt is used not just for flavor, but to regulate the yeast and strengthen the gluten network. And finally, a minuscule amount of yeast. We’re talking less than a gram for a whole batch. This isn't about a fast rise; it's about a long, slow fermentation where deep, complex flavors have time to develop.
The Rhythmic Dance of Mixing and Kneading
Making this dough is a tactile, almost meditative process. It begins by dissolving the sea salt into your water. Then, you add just a small amount of your flour to create a milky liquid before whisking in the yeast. Only then do you begin to gradually incorporate the rest of the flour, mixing until a shaggy, cohesive mass forms. This method ensures the salt doesn't come into direct, prolonged contact with the yeast, which can hinder its activity.
Now comes the real work: kneading. Whether you do it by hand on a counter or use a stand mixer with a dough hook, the goal is the same. You are developing the gluten structure, turning that sticky mass into a smooth, elastic, and supple dough. If you're kneading by hand, try the "slap and fold" method you can find in many online videos. It’s messy at first, but incredibly effective. You’ll spend about 15-20 minutes working the dough until it feels alive and resilient, springing back gently when you poke it.
I used to be impatient with this step, but I’ve learned that you can’t rush the development of gluten. This network is what will trap all the beautiful gas bubbles from the yeast, creating the airy pockets that define a Neapolitan crust. It’s a labor of love, and you’ll feel the dough transform under your hands. It’s a connection to the food you’re making that is deeply satisfying.
The Virtue of Patience: Fermentation is Flavor
Once your dough is kneaded, the active work is mostly over. Now, you just have to wait. This is the hardest part for many, but it's also where the true magic happens. The dough is placed in a lightly oiled bowl, covered, and left to rise for about two hours at room temperature. This is the first fermentation, or the "bulk ferment."
After this initial rise, you'll gently release the dough onto a floured surface, divide it into individual portions (about 250g each is a good starting point), and form them into tight, smooth balls. This is the staglio a mano, or the hand-shaping of the dough balls. These balls are then placed in a proofing box or a sealed container and put into the refrigerator for a long, cold fermentation. This can be anywhere from 24 to 72 hours.
This cold ferment is the secret to incredible flavor. The yeast works much more slowly in the cold, producing subtle, complex flavors that you simply can't get from a quick-rising dough. It also makes the dough more digestible and gives the crust a beautiful texture. When you're ready to make pizza, just take the dough balls out of the fridge a few hours ahead of time to let them come to room temperature. They will be soft, pillowy, and full of potential.
From Ball to Pie: The Final, Gentle Stretch
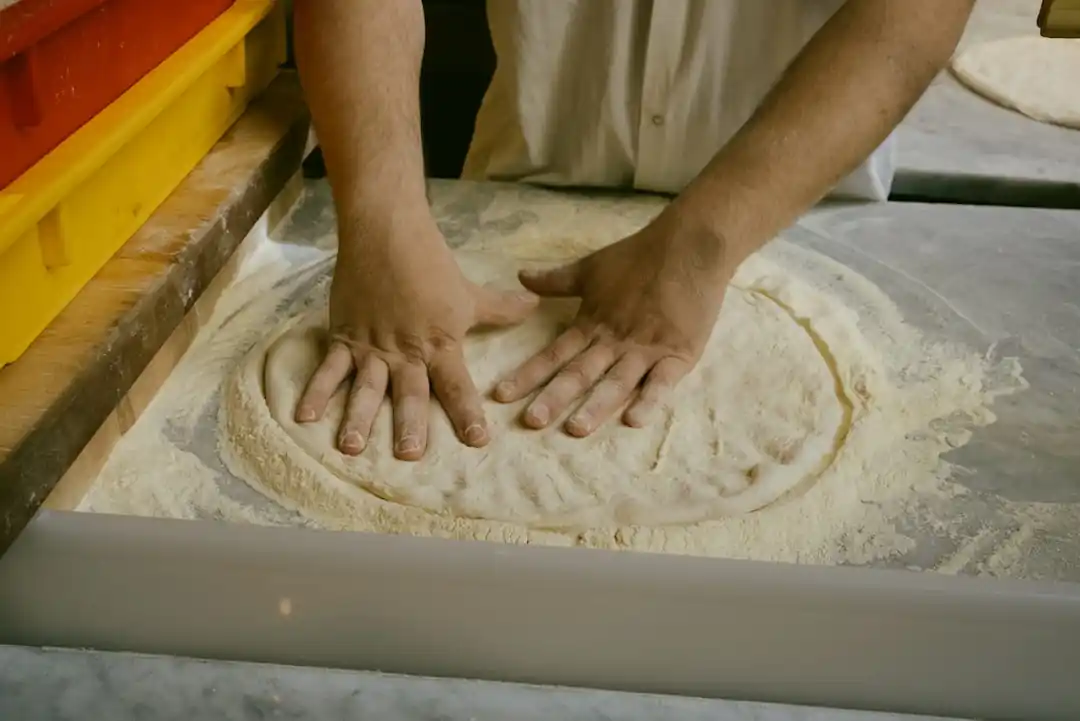
When your dough balls are proofed and ready, it's time to shape your pizza. The number one rule? No rolling pins. A rolling pin would crush all the delicate air bubbles you’ve patiently cultivated. Instead, you’ll stretch the dough by hand.
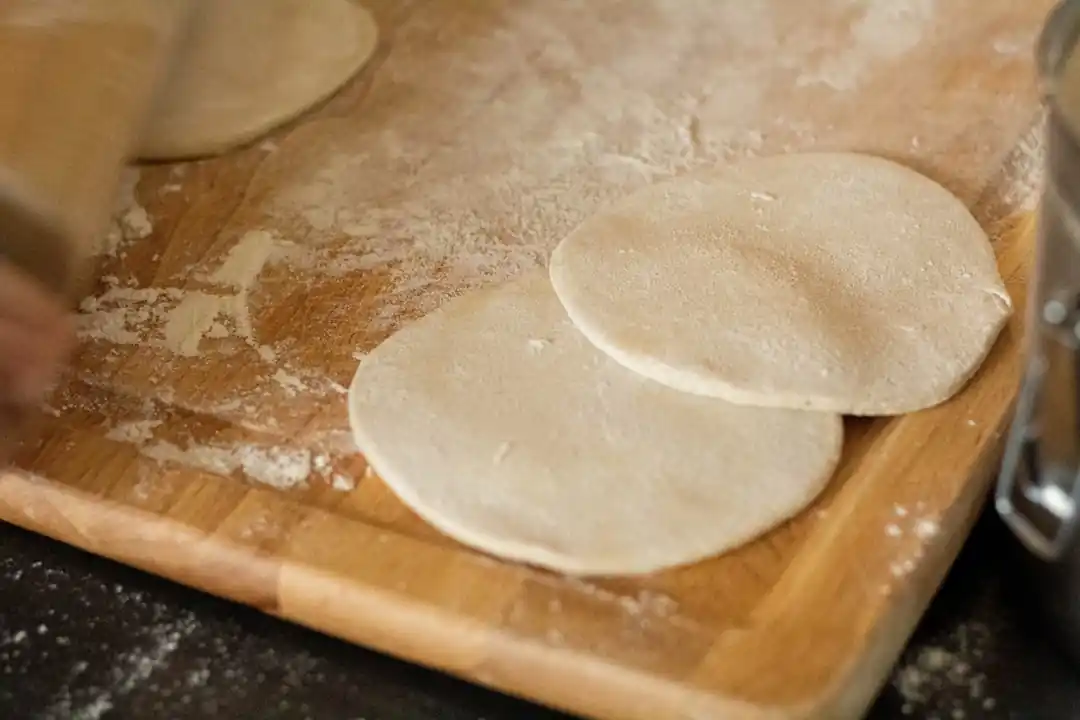
Place a dough ball in a small pile of flour and gently press down in the center with your fingertips, leaving about a one-inch border untouched. This border will become your cornicione. Then, pick up the dough and gently begin to stretch it over your knuckles, rotating it like a steering wheel. The weight of the dough will help it stretch naturally. The goal is a paper-thin center and a puffy, airy edge. It takes a bit of practice to avoid tearing it, but don't be discouraged. Even a misshapen pizza will taste delicious.
From here, it's a quick journey. Add your toppings (less is more with Neapolitan pizza), slide it onto a screaming hot pizza stone or steel in your home oven, and bake for just a few minutes until the crust is blistered and golden. The result is a pizza that is so much more than the sum of its parts—a taste of Naples, born from your own hands. It’s a process that teaches you to slow down, to appreciate simplicity, and to find joy in creation.
You might also like

The Ultimate Guide to Panama's Weather: When to Chase the Sun
Dreaming of a Panamanian escape but stuck on when to go? Let's break down the seasons to find your perfect window for sunshine and adventure.
Fueling the Win: A Sample Weekly Meal Plan for the Athlete in Training
It's not just about the workout; it's about the fuel. Discover a sample weekly meal plan designed to boost performance, speed up recovery, and keep you at the top of your game.

More Than a Day Off: The Deep Significance of Martin Luther King Jr. Day
It's easy to see it as just a break from work, but the story and purpose behind MLK Day run much deeper. It's a call to action we can all answer.

Casting into the Great Lake: A Beginner's Guide to Fishing Lake Erie
Thinking about your first fishing trip to Lake Erie? It’s less intimidating than it looks. Here’s a friendly guide to the rules, the gear, and the fish you’ll meet.

Cracking the Code: A Friendly Guide to Your 401(k) Investment Options
Feeling a little lost in the world of 401(k)s? You're not alone. Let's walk through the basic investment choices, so you can feel confident about your financial future.