From Scratch: The Ultimate Guide to Homemade Everything Bagels
A deep dive into making authentic, chewy, and flavorful everything bagels at home. It's easier than you think!
There’s a certain romance to a weekend morning, isn’t there? The slow pace, the smell of fresh coffee, and, if you’re lucky, a truly spectacular bagel. For years, my quest for the perfect everything bagel was a weekend ritual in itself. I’d drive to different bakeries, always searching for that elusive combination: a glossy, flavorful crust that gives way to a dense, chewy interior. But more often than not, I’d come home with something that was more like a round piece of bread. It was… fine. But it wasn’t the bagel of my dreams.
That’s when I decided to take matters into my own hands. The idea of making bagels from scratch felt like a monumental undertaking, something reserved for professional bakers with secret, age-old techniques. The boiling, the shaping, the special ingredients—it all seemed so complex. Honestly, I was intimidated. But I can tell you now, having come out the other side with flour in my hair and the scent of baked goods filling my home, that it is one of the most rewarding kitchen projects you can ever tackle.
It’s more than just a recipe; it’s a process. A wonderfully tactile and almost meditative experience that connects you to your food in a way that buying something off a shelf never can. And the result? A warm, fragrant, perfectly chewy bagel that is worlds away from its store-bought cousins. It’s a small, profound luxury. So, if you’ve ever dreamed of pulling a tray of perfect bagels from your own oven, let’s do it together. It’s so much easier than you think.
The Heart of the Matter: A Sturdy, Chewy Dough
The soul of a bagel lies in its dough. This is where that signature chew is born, and it all starts with a few key, yet simple, ingredients. Unlike softer bread doughs, bagel dough is what’s known as a low-hydration or "stiff" dough. This means it has a lower water-to-flour ratio, which is absolutely critical for developing the dense, tight crumb we’re looking for. The most important player here is high-protein bread flour. I can't stress this enough—using all-purpose flour just won't give you the same robust gluten structure needed for that satisfying chew.
The other ingredients are humble but mighty. You'll need warm water to wake up the yeast, a touch of salt for flavor, and a little bit of sweetener. Many traditional New York-style bagel recipes call for barley malt syrup, which lends a subtle, malty sweetness and helps achieve that classic golden-brown crust. It can sometimes be a bit of a specialty item, but I’ve found that brown sugar or even honey works as a fantastic and easily accessible substitute, still providing the yeast with food and aiding in a beautiful caramelization in the oven.
Once you bring the ingredients together, it’s time to knead. And I mean, really knead. This dough is stiff, so if you’re using a stand mixer, it’s going to get a workout. If you’re kneading by hand, consider it your arm workout for the day. You’re looking for the dough to transform into a smooth, elastic, and firm ball. After this, it needs to rest and rise in a warm spot for about an hour or so, until it has visibly puffed up. This first proof is where the yeast begins its work, developing the complex flavors that will make your finished bagel sing.
The Magic Step: The Boil and the Bake
Here it is. The one step that unequivocally defines a bagel and separates it from any other type of bread. Boiling the shaped dough before it hits the oven is the non-negotiable secret to a real bagel. It might seem strange, even counterintuitive, to drop your beautifully proofed dough into a pot of simmering water, but this is where the magic happens. The hot water bath gelatinizes the starches on the outside of the bagel, creating a distinct crust that prevents it from springing up too much in the oven. This is what locks in the moisture and sets the stage for that dense, chewy interior.
How long you boil them is a matter of preference. A shorter boil, about 30-45 seconds per side, will result in a slightly thinner, more delicate crust. If you’re a fiend for an intensely chewy bagel with a substantial crust like I am, you’ll want to push it to a full minute, or even a little longer, on each side. I also love to add a spoonful of honey or brown sugar to the boiling water. This not only adds a hint of flavor but also helps create a beautiful, glossy sheen on the finished product.
After their quick bath, the bagels are ready for their final flourish. A simple egg wash (one egg beaten with a splash of water) is brushed over the top. This is the glue that will hold onto your toppings and gives the bagels a gorgeous, shiny finish as they bake. Then, it’s into a hot oven, around 425°F (220°C). The high heat works quickly, setting the crust and creating that perfect golden-brown color in about 15-20 minutes. The aroma that will fill your house at this point is your delicious reward.
Everything, and Then Some: The Iconic Topping
What is an everything bagel without its glorious, chaotic mess of a topping? It’s a symphony of textures and savory flavors that makes each bite an adventure. While you can easily find pre-made "Everything Bagel Seasoning" in most grocery stores these days, I find a deep sense of satisfaction in mixing my own. It’s incredibly simple, and it allows you to control the ratios. Love garlic? Add a little extra. Prefer a saltier kick? You’re the boss.
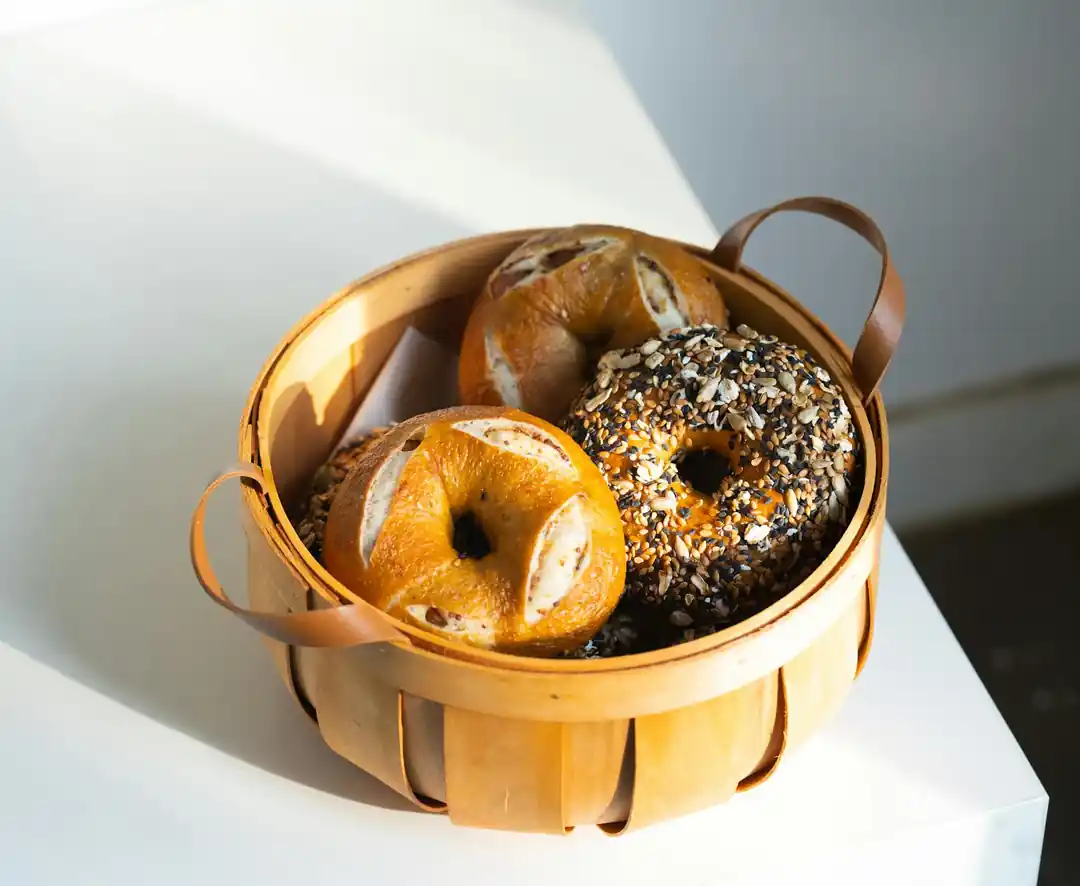
The classic components are poppy seeds, toasted sesame seeds (I like a mix of both black and white), dried minced garlic, dried minced onion, and coarse or flaky sea salt. It’s crucial to use the minced, dried versions of garlic and onion rather than the powdered form; you want those little crunchy bits. The flaky sea salt also makes a huge difference, providing pleasant bursts of saltiness rather than an overwhelming saline flavor.
The application is the best part. Once the bagels have been boiled and brushed with the egg wash, you can go about this in two ways. You can either sprinkle the seasoning generously over the top, or you can take the more direct (and my preferred) route: press the wet, top side of the bagel directly into a shallow dish filled with your seasoning blend. Don’t be timid here. A proper everything bagel should be absolutely coated in it. This is what you’ve worked for, so make it count.
The hardest part of this entire process, I promise, is waiting for the bagels to cool down just enough to handle once they’re out of the oven. Slicing into a still-steaming bagel, slathering it with cream cheese, and taking that first, perfect bite is a moment of pure, unadulterated joy. It’s a taste of accomplishment. It’s the realization that you don’t need a special bakery to have a world-class bagel. You just need a little time, a little flour on your counter, and the desire to make something wonderful. I hope you give it a try.
You might also like

Build Your Comfort: Are Adult LEGO Crocs The Ultimate Nostalgia Trip?
It’s the collaboration we never knew we needed, but now can’t stop thinking about. LEGO and Crocs have teamed up, and they’re starting with the adults.

The Remote Island Dream: How to Find Paradise on a Shoestring Budget
You don't need a millionaire's bank account to escape to a remote island. Here’s how to find your own slice of paradise without breaking the bank.

Beyond the Job Title: How to Build a Career Plan That Actually Inspires You
Feeling a little lost in your professional life? It's time to stop drifting and start designing. Let's talk about how to create a long-term career development plan that feels less like a chore and more like a roadmap to a life you love.

Your Guide to a DIY Home Energy Audit: Stop Leaks and Start Saving
That creeping feeling when the utility bill arrives? It's time to fight back. Learn how to conduct a simple home energy audit to find hidden energy vampires and start saving money.

The Best Ways to Get From Vancouver Airport to Whistler
Just landed at YVR and dreaming of the mountains? Figuring out the last leg of your journey to Whistler can be a puzzle. Let's break down the best ways to get from the airport to the slopes.